Hi,
I finally managed to sit down and write the next part of the pond series. In part 3 we will give instructions on pond lining and filling. The lining will make our pond waterproof. For this part, you may need an extra set of hands. Depending on the size of the liner and your pond.

Lining pond with fleece 
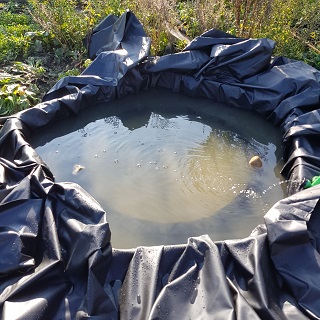
Pond is lined with waterproof liner and filling up 
Filled up pond, ready for rocking and prettifying
1. Prepare the pond for the liner
Now that our pond’s walls are properly retained, and the pond is not going to crumble. We will line it with the waterproof liner. But before we add the waterproof liner, we will prepare our pond. DO NOT SKIP THIS STEP.
In order to minimize the possibility of plant roots and various small rocks to penetrate our waterproof liner, we will first line the pond with a pond fleece. This will prevent future problems with the liner. Even though when you first put your liner it will look loose, the pressure of water will make it cling very very tightly to ANY protrusion. And therefore if we have no fleece below, our liner will suffer. When laying your fleece, make sure to overlap the pieces. It is better to overlap and have a thicker layer than to save and have issues later on.
Even though you don’t need an extra person for this part, working in pair makes things easier, since the other person can help you measure the fleece and set it in place more easily. So, use the volunteers for this part as well.
2. Lining pond with waterproof liner
When you have finished lining pond with the fleece, it is time to add the liner. For this task you really need two people at least. Since our pond is deep, we had a huge liner. Our liner was 30 square meters, and the weight of it is substantial. You have to make sure that you have more than enough. When calculating the pond liner size you can add an extra meter to the calculation. This will enable you to move it about and push it in all the cervices of your pond. In this case, any extra liner will save you a ton of headache.
Since our pond is deep and the inner part is round, we found out that the easiest solution is to fold it in a wedge making sure that the top of the wedge is the center of liner. Then put the top of the wedge in the middle of the pond. Try to push it as deep as possible without disturbing the fleece. Lastly unfold the liner over the pond. Now arrange the liner to somewhat follow the pond sides. And we can start filling it in.
3. Fill the pond and adjust the liner
Finally, we are ready to fill the pond. This part saw me running around the pond and constantly adjusting the pond liner on all sides. Lining the pond was quite exhausting 😮
Since our pond is quite deep, we first filled in a small amount of water, cca 15 L. It started to stretch the liner, but because of the small diameter of the pond and high sides, the water alone was not enough to stretch the liner to the corners. So we used a brush to gently and slowly manipulate the liner to the shape of the pond. Then we continued to fill in the pond while slowly adjusting the liner to the shape of the pond. Slowly adjusting the liner means running around the pond while gently adjusting the liner where necessary as the water is filling up the pond. Always being careful not to disturb the fleece. Also, be careful not to completely fill the pond now. You will finish filling it up when you finish the sides.
When you are done with stretching the liner and filling the pond. It is time to make it pretty by covering the sides of the pond and planting the edges. You can also cut the extra liner, but don’t cut it to the exact pond size. Leave at least 30 cm (1 foot) liner extra. Add the rocks to the pond and the pond plants, and your pond is done! 🙂
Adding to the pond
If you are adding the fish I suggest leaving the pond to stabilize for at least one month. Also if you are making your pond in autumn, then wait until the spring to add the fish in. Even if the fish are cold-water fish like goldfish or koi, I would wait with their addition until the last frost has passed. Plants will also be better added in spring instead of before winter. But the pond can stay filled in with water until spring. All the chemicals will evaporate until then.
Conclusion
If you are building the pond to be a wildlife pond, or to house the fish. Or simply as a reflective pond, do now rush. Ponds take time. It is more likely that, like in our case, it will take you a couple of days to finish your pond. And that is ok. It is better to take it slowly than to rush and have calamities later. Also, don’t stress. You can always tweak it a bit. Enjoy the process and do not hesitate to ask for an extra pair of hands. 🙂