Hi all,
this summer I continued with the flower borders and more features of the garden. I decided to change the design a bit. Mostly because some things make more sense when I take a look at the garden. One of the first things that will change is that we will have 4 round lawns instead of 3. But that will in turn follow a natural lawn shape that we now have in our garden, so makes sense to do that. Which , in turn, brings me to another change – privet hedge. This hedge will be next to our clover lawn, and for that I need to do some privet propagation.
Privet propagation – how to & summer vs autumn propagation
I propagate privet in a very simple manner. I take a cutting, stick it into the soil and let it develop roots. I keep it in the house for the first winter, but I also stuck some cuttings into the ground and let them grow over winter, and that worked as well. You can also leave cutting to root in the glass of water. But then I found them all over the place, and sometimes I forget to add some water and they dry out. Sticking cuttings into the soil has proven to be a better way to go. Here is a little video on how I do that:
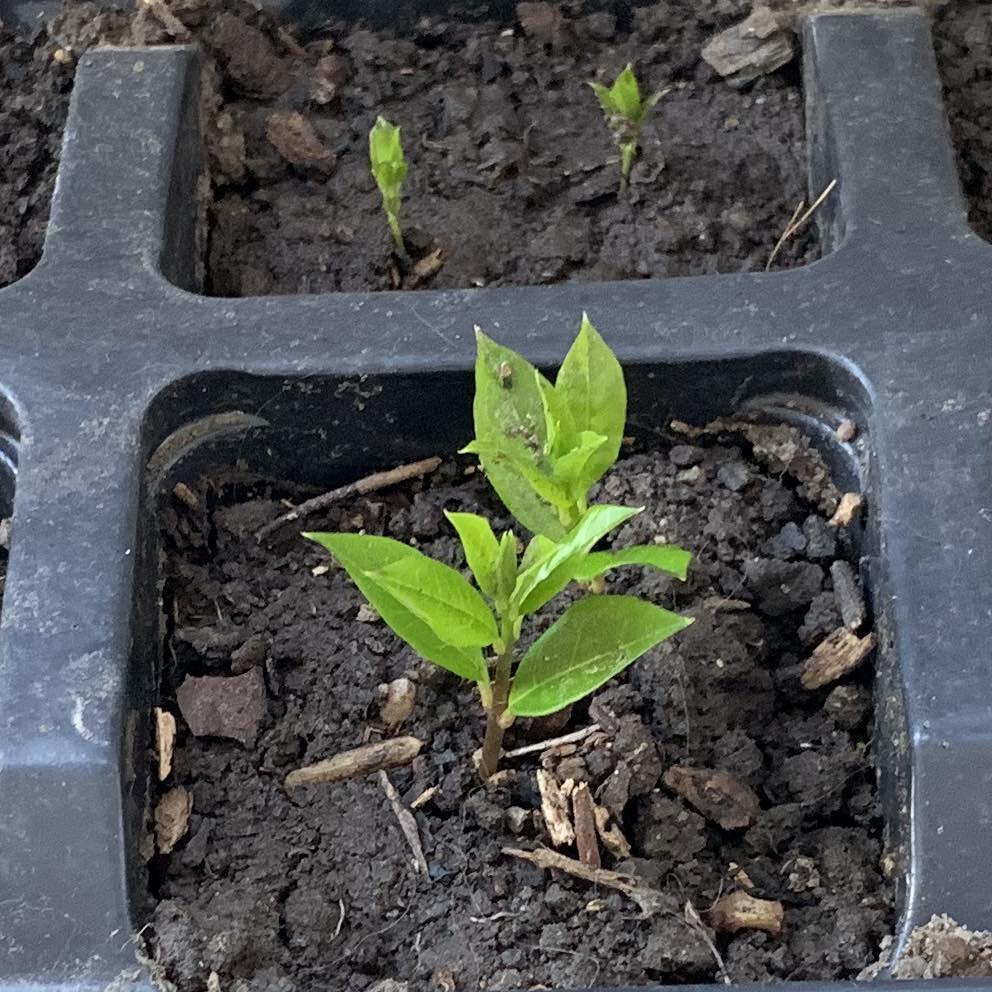
So far when I propagated privet, I did this in late autumn with the fully ripe cuttings. But this year I learned that you can also do privet propagation in summer with semi-ripe cuttings. Since I had to cut and form our privet balls, I opted to also propagate privet for the new hedge. And I have to admit. I prefer the autumn propagation with ripe cuttings. Summer propagation works, but, you need to keep them in shady area, and preferably in a constant temperature that is not too high. The first part about keeping them in shade is no biggy. But the temperature has proven a BIG issue this year.
Tough year for privet propagation
I mean really… We had maybe one week of normal summer temperatures, and the rest of summer was raining and quite some low temperatures. The temperature was constantly jumping up and down, and that proved to be too stressful for a lot of plants, including my privet cuttings.
Semi ripe cuttings are more problematic then ripe cuttings – they are way more sensitive, and like to flop around. I found out I had to moisten the leaves to keep them somewhat happy. In the hindsight, putting them under a cloche or in a bag would have been a good choice. However, even though I lost some to the stress of weather, they did root. They don’t need rooting hormone, but it won’t do any harm. If you have some rooting hormone, you can use it.
Lessons learned
So when it comes to the privet & privet propagation I have learned a lot. Here’s a short recap:
- all you need is a little top of the privet in order to propagate it. (ask the neighbor for the tops when he is trimming his privet hedge)
- privet propagation is super easy. No need to buy a lot of plants, the privet grows quickly and with just a little patience you can get a lot of plants for free
- it is disease resistant and the bugs don’t bug it
- summer privet propagation is somewhat tricky due to the cutting being semi ripe and the weather not acting nicely
- autumn privet propagation is easier eve though in the spring time the plants from autumn propagation will be smaller then the ones that are propagated in summer
- privet grows quickly and you will have several batches of cuttings during the year -> here summer propagation does the trick
- no need for rooting hormone
Since this procedure is so easy, please give it a try. It is super easy and rewarding. Just make sure that privet is not considered invasive in your area. For us in Europe it is readily available, and there are even variegated versions that grow a bit more slowly but are an interesting option to the garden. Works great as a boxwood substitute in areas that are hit hard by boxwood blight and boxwood moth.
I hope I will get a top from my neighbors golden privet (Ligustrum ovalifolium Aureum) this year. I would like to make a topiary out of it 🙂 See you soon 😉
I want to overwinter my private cutting. Thank you for writing that article. You said you wintered them inside. Did you keep them in a south facing window upstairs or in the basement please elaborate. Thank you very much. By the way I live in zone 6A and 6B.
Hi Nancy. Thank you for asking that question. I keep mine in the east or west facing window. So they have a bit of sunlight. The south facing window would be a bit too much for them, and watering them would require more efforts. North windows are fine, but they can ge a bit more “leggy” there. They will still do just fine.
If you have a “high” basement, that has windows you could keep them there on a window sill, if the temperature of the basement is above the freezing point. But for me it is hard to remember to water them if I don’t see them, so I keep them in the house 🙂 (living room or kitchen to be precise). If you decide to keep them in the basement, and the temperatures are a bit lower there, you won’t see any growth. In the house you will see a slow growth throughout the winter. I hope this helps you.